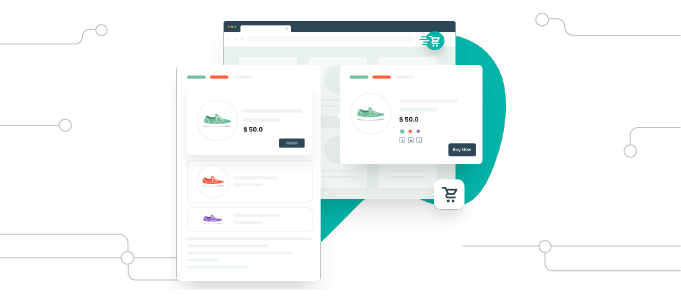
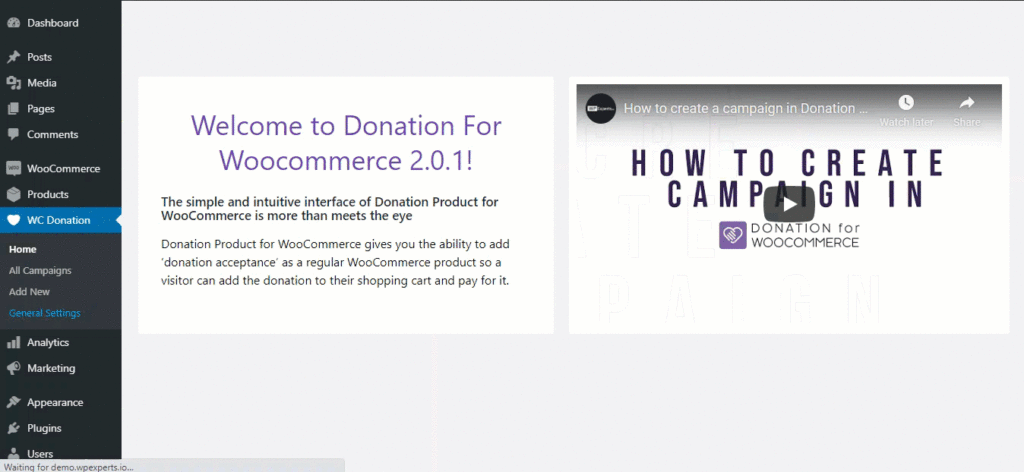
Donation For WooCommerce is the ultimate WooCommerce extension for creating powerful fundraising campaigns that go beyond simple donation collections. With this versatile tool, you can tailor your donation campaigns to your specific needs, incorporating features like recurring donation payments, progress goals, round-up donations, and much more.
Overview
Whether you’re a nonprofit organization, charity, or any cause-driven entity, Donation for WooCommerce empowers you to raise funds and build a community of donors effectively. Get started now and take your fundraising efforts to the next level!
- Create Donation Campaigns: Easily collect charitable donation payments anywhere on your WooCommerce website. Whether you’re raising funds for nonprofits, charities, NGOs, clubs, or any other cause, Donation for WooCommerce simplifies the process.
- Recurring Donations: Our solution is the only one that focuses on ongoing, recurring donations right out of the box. You can set up recurring donation payments using WooCommerce Subscriptions to ensure a continuous stream of support.
- Flexible Donation Options: Configure donation amount types, limits, and levels. Choose from predefined values or allow users to enter custom donation amounts. Set minimum and maximum limits to tailor the options to your campaign.
- Progress Goals: Create a sense of urgency and motivate donors by setting and displaying goals for your donation campaign. You can track and showcase the total amount collected, percentage completed, the number of donations received, days left, and unique donor count.
- Round-Up Donations: Encourage generosity by offering the option to round up the final purchase amount and donate the difference. It’s a simple way for customers to make a little extra impact with each purchase.
- Seamless Integration: Donation options can be easily added to your shop, product, cart, and checkout pages, providing multiple touchpoints for users to support your cause. You can even include a donation widget for added visibility.
- Detailed Progress Bars: Display the collected donation amount in currency value and percentage, making it transparent and visually engaging for your donors. You can also set specific targets for the number of donations and days left in your campaign.
- Unique Donor Count: Showcase the unique donor count on your goal’s progress bar, highlighting the growing community of supporters.
Donation For WooCommerce Features
General Features
- Create multiple donation campaigns.
- Allow custom donation amounts.
- Present predefined donation amount choices.
- Enable users to contribute to multiple campaigns simultaneously.
- Permit users to include decimal values in their donations.
- Filter donation orders by the campaign name.
- Display various campaign donation options on the cart or checkout page.
- Apply credit card processing fees to donations.
- Set credit card processing fees for multiple donation campaigns.
- Configure credit card processing fees as either a percentage or a fixed amount.
- Add multiple support causes to a donation campaign.
- Access donation campaign statistics.
- Display donation amounts in various styles (Radio, label, dropdown).
- Adjust the position of the currency symbol.
- Implement metadata functionality.
- Provide support for Gutenberg Blocks.
- Export donation reports in CSV and PDF formats.
- Send donation receipts to users via email.
- Incorporate Gift Aid UK based on the Cart or Checkout.
- Add Tributes to donation campaigns.
- Manually synchronize and update donation order data.
- Organize multiple donations using tabs.
- Enable the Donation API for creating, updating, deleting, and retrieving campaigns by their ID.
- Set a daily or specific day timer to accept donations only during this time frame.
- Customize currency symbol color, currency background color, and tribute box color.
- Present predefined donation amount choices. (Replace)
- Present predefined, custom, or both donation amount choices (With)
Recurring Donation Features
- Collect recurring donations on a daily, weekly, or monthly basis.
- Define interval and length settings for recurring donations.
- Display order details of the donation amount, including campaign name, amount type, and campaign ID.
- Allow users to create recurring donation payment plans at intervals.
Note: To collect recurring donations, it is necessary to install and activate the WooCommerce Subscriptions plugin. Once activated, you can enable recurring donations in the campaign settings tab.
Donation Goal Features
- Display a progress bar showing the collected donation amount in currency value.
- Show the goal progress bar’s value as a percentage.
- Define and display the number of donations required to close the campaign.
- Specify and display the number of days left in the donation campaign.
- Indicate a unique donor count on the goal’s progress bar.
- Display a custom ‘thank you message’ upon the campaign reaching its goal.
- Present the goal summary on a page or post using a shortcode.
- Reset donation campaign goals.
- Display the goal progress bar on the shop page.
- Display a Donor Wall to Appreciate all Donors.
Donation Widget Features
- Display the donation widget on the cart and checkout pages.
- Include a donation widget on the shop or product pages.
- Customize the form and widget options, including button text color, button label, and button color.
- Add the donation widget to the website’s sidebar or footer.
- Display the donation widget on the website’s pages through a shortcode.
- Present the goal progress bar on the donation widget.
- Show the goal summary within the widget.
Round-Up Donation Features
- The “Round-Up” feature offers shoppers the choice to round up their bill amount and donate the change.
- The “Round-Up multiplier” calculates a new total by rounding off the cart amount to the nearest number divisible by the round-up multiplier.
- Customize the “Round Off Donation” popup, including popup title, message, button text color, and background color.
- Display a donation request popup with the “Round Off Donation” option.
Compatibility & Integrations
- Compatible with WooCommerce Subscriptions.
- Support for translation via the Loco Translate Plugin.
- Compatible with Currency Switcher for WooCommerce.
- Support for translation through the WPML Plugin.
Why Use Donation for WooCommerce?
Display Donation Options Anywhere on The Website
Effortlessly showcase donation options on your shop, product, cart, checkout page, sidebar, footer etc., with predetermined values. Additionally, you can provide visitors with the option to input a custom value, allowing them to contribute any amount they want.
Comfortably Collect Recurring Donations
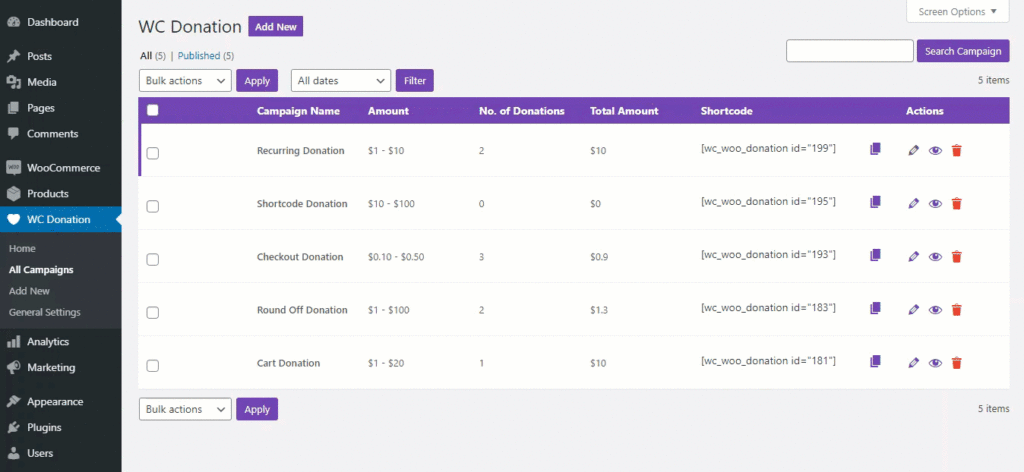
Making recurring donations a seamless process is now possible with Donation for WooCommerce and WooCommerce Subscriptions. Your supporters can effortlessly select recurring donations directly from the online donation form.
Accept Donations for Different Causes
Making it simple to collect contributions for various reasons, you can add multiple support causes to your campaign. For example, you can include causes like cultural education, global warming, and disaster relief under the same donation campaign. You’re free to provide a title, description, and logo for each cause to make it more engaging.
Display Multiple Donation Campaigns on Checkout and Cart Page
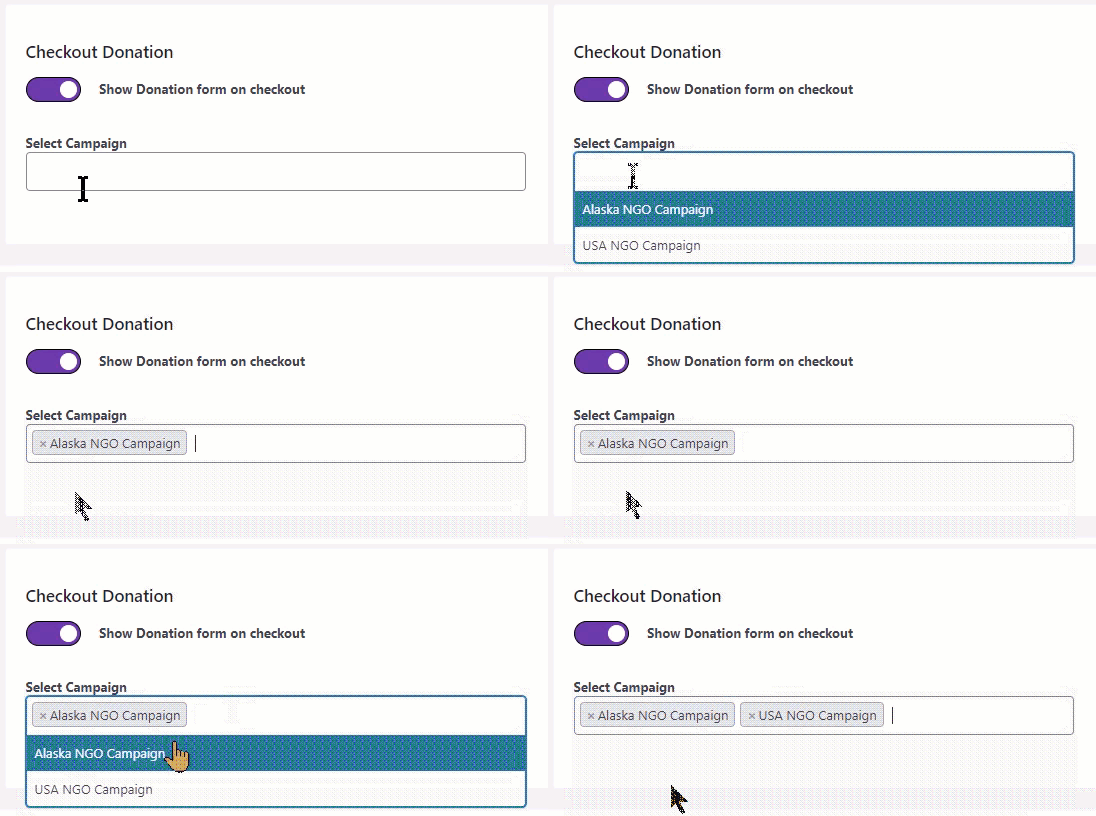
You can easily turn the cart and checkout donation option on or off with a simple toggle switch. Additionally, you have the flexibility to show multiple campaigns on both the cart and checkout pages at the same time. This simplifies the process for your customers to contribute to multiple donation campaigns.
Charge Users with A Donation Processing Fee (Percentage or Fixed)

This feature enables you to apply a processing fee (either Percentage or Fixed) to donations made via credit cards. The admin will request the credit card processing fee from the user before processing the donation amount. In the event that the user declines, the processing fee will be subtracted from the total donation amount.
Automatically Email Donation Receipts to Donors
By enabling this feature, the system will automatically generate a PDF invoice for any new order containing a donation product. This PDF invoice will then be sent to both the customer and the admin via email.
Export Donation Reports in PDF and CSV Formats
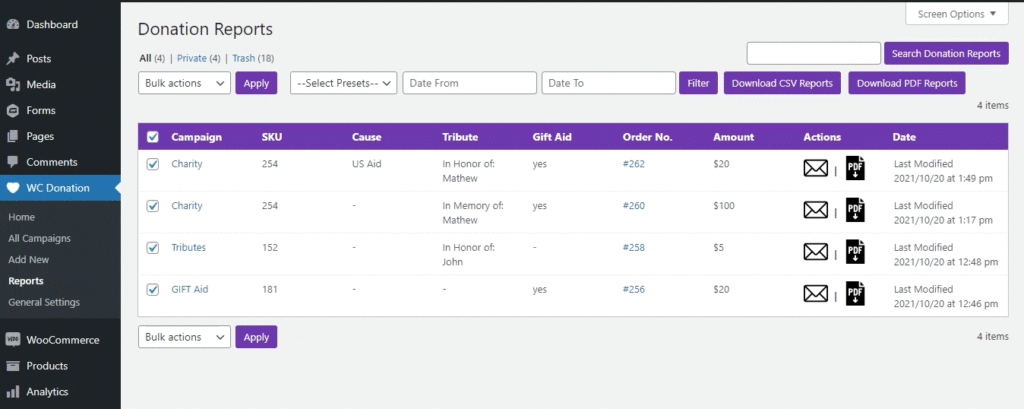
You have the ability to export all donation reports in either PDF or CSV format. The donation report dashboard offers various filters, including presets such as yesterday, last 7 days, last month, and last year, as well as custom date ranges for your convenience.
Pricing Plan
Donation for WooCommerce offers a competitive pricing plan to suit your needs:
$99 per year for 1 Site
Start Making a Difference Today
Don’t miss out on the opportunity to streamline your fundraising efforts, encourage recurring donations, and reach your campaign goals. Get Donation for WooCommerce today and elevate your fundraising to new heights.

Multi Select Campaign
Activate or deactivate the cart and checkout donation with the toggle.

Credit Card Fees Types
Select multiple campaigns and choose between percentage and fixed fees.

Donation REST API
Donation REST API allows you to create, update, delete and retrieve all or specific donation campaigns.

Donation Campaigns Tab Page
Display multiple donation campaigns on the donation tabs page simultaneously. The tabs are shown as options on the front end.

Synchronize Donation Data
You can manually synchronize the data for your donation campaigns to ensure that there are no incorrect values.

Display goal progress on the donation widget
Enhance the donation widget’s capability by displaying your donation campaign’s goal progress.

Multi Select Campaign
Activate or deactivate the cart and checkout donation with the toggle.

Credit Card Fees Types
Select multiple campaigns and choose between percentage and fixed fees.

Donation Campaigns Tab Page
Display multiple donation campaigns on the donation tabs page simultaneously. The tabs are shown as options on the front end.

Reset donation goal campaigns
Your donation campaign’s goals and progress can be reset with just a click of a button.

Display summary on the donation widget
You can display your donation campaign's summary (title & description) on the donation widget.

Two types of donation amount options
Give your users the choice to either enter an amount of their choice or select from predefined values

Donation value on the check out and cart page
Display the value of the donation product on the checkout page and allow users to change the amount if they desire.

Filter donation orders by campaign name.
Easily keep track of your donation amounts by using filters that sort your donation orders by campaign name.

Create multiple donation campaigns
Easily create donation products and promote different campaigns all without managing a complex system.

Set the position of the currency symbol
A customizable option that lets you choose the position of the currency symbol on the donation collection field.

Easy to use and manage
Save hours on collecting funds through different WooCommerce donation plugins and extensions.

WooCommerce Round-Up prices for charity
Round-up your customer's final billing amount to the next highest dollar and donate the difference to charity.

Metadata functionality
Donation for WooCommerce creates a separate list for amounts collected from your donation campaigns.

Analyze your donation campaign's statistics
View your donation campaigns' statistics (number of donations, total amount donated, etc.) to further improve your efforts.

Support causes
Add multiple support causes to your campaign to collect donations for different reasons.

Recurring donation payment plan
User can define the length of their recurring donation payment plan by choosing different donation length types.

Collect recurring donations
Create variable subscriptions and collect recurring donations on a daily, weekly, or monthly basis.

Display the donation widget anywhere on the website
The donation widget allows you to show the donation box on any page or post using the campaign’s shortcode.

Credit card processing fee
Charge users with a processing fee for any donation made using credit cards.

Daily Duration/Timer Configuration
Set customizable daily or specific day timers to encourage donors to contribute within a specific time frame.

Donor Wall
Highlight the names of your wonderful donors on a dedicated wall, showing gratitude for their support.


